03 Show Current Block
One thing about SensorCraft that is that the GUI (the Graphical User Interface, this is the screen where you play the game) does not show the current block selected. Sometimes you forget which block is selected and will place the wrong block accidentally. We created this YouTube video about this chapter 03 Show Current Block. A simple way to remedy this problem is to extend the “draw_label” method which we talked about in the previous chapter that shows the numbers in the upper left corner:

To get started with this programming exercise, first copy 02_3D_coordinate_system_TVR.py code to a new file 03_show_current_block_TVR.py but replace TVR with your initials using the following command:
cp 02_3D_coordinate_system_TVR.py 03_show_current_block_TVR.py
This command will start a new file with all the traits of the last exercise
being the world is flat, press the B key and a wall will be constructed, and the
three number lines exist on each axis. How do you think the “draw_label” method
should be extended to also display the block that is currently selected? If you
examine the __init__ method for the class called Window on line 440 - 499 you
will notice many variables are being initiated. These variables have comments
above them that describe the purpose of the variables which is convenient for us
because we didn’t write the original code. Take special note of the variable
‘self.block’ on line 482 which contains the current block the user can place.
Using an if/elif construct like we did in the programming exercise on building
automatically we can examine the variable ‘self.block’ then build the proper
text. Jump down to line 845 where the draw_label method lives and we changed
the code to look like the following:
    def draw_label(self):
        """ Draw the label in the top left of the screen. Label includes
            the current block selection.

        """
        # determines the current block selected
        if (self.block == BRICK):
            blockSelectedString = "Brick"
        elif (self.block == GRASS):
            blockSelectedString = "Grass"
        elif (self.block == SAND):
            blockSelectedString = "Sand"

        x, y, z = self.position
        self.label.text = '%02d (%.2f, %.2f, %.2f) %d / %d Block: %s' % (
            pyglet.clock.get_fps(), x, y, z,
            len(self.model._shown), len(self.model.world),
            blockSelectedString)
        self.label.draw()
After that change is made run the new game in IDLE by opening your new file and
pushing the F5 key in the editor window.
Now you can see the block selected in the label like the following example:
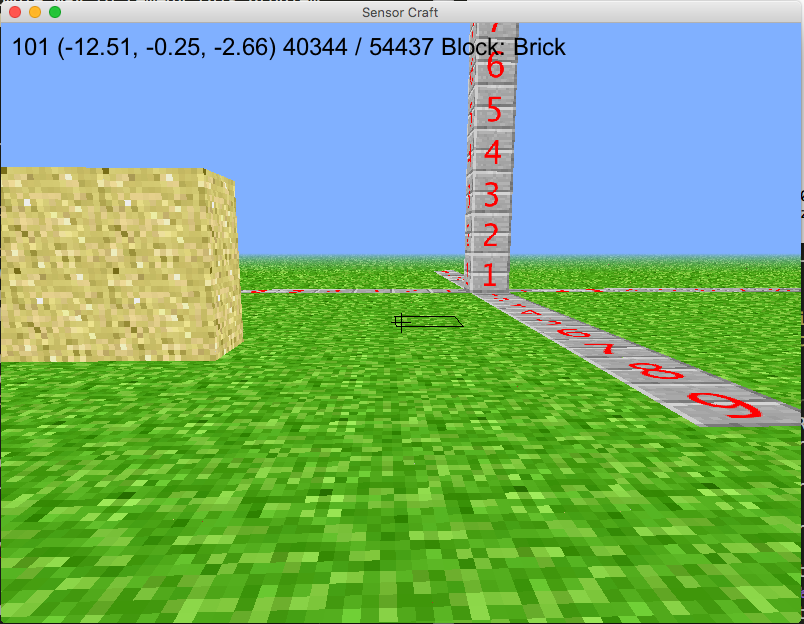
If the user presses a number key (1,2,3) then watch the block text change.
Another GUI element that is easy to change is the target cursor. The SensorCraft code refers to the target cursor as a “reticle” which is the same thing but is less characters to type. First to change the color look at the “draw_reticle” method starting on line 865:
    def draw_reticle(self):
        """ Draw the crosshairs in the center of the screen.

        """
        glColor3d(0, 0, 0)
        self.reticle.draw(GL_LINES)
The OpenGL function “glColor3d” which is imported by pyglet.gl uses the RGB (red, green, blue) color model. The RGB color model is simply the amount of color to apply when it is 0 no color (black) is applied but when it is 255 (white) as much of that color as possible is used. It turns out you can represent a large number of colors with some mixture of red, green, and blue. If you want the reticle to be red change line 869 to be “glColor3d(255, 0, 0)”. How about if you want a totally green reticle? Then change line 869 to be “glColor3d(0, 255, 0)”. By default SensorCraft uses a black reticle by removing all color by setting the RGB values all to 0, with the line 869 “glColor3d(0, 0, 0)”. If you want a white reticle use this for line 860 “glColor3d(255, 255, 255)”. To change the size of the reticle simply change line 776 from “n = 10” to “n = 20” that will double the reticle size, experiment with different size n to see which size you like best.