01 Building Automatically
Building a Wall Automatically - Part 1
For a computer scientist, code runs the world but this is true for the everyday person on planet Earth even if they do not realize it. Code is in your refrigerator, microwave, car, TV, you name it code runs the device. We live in a digital age.
One thing that is not apparent to most people is that when you have the source code to your device or game you can do almost anything that you can imagine. Think about your favorite game. Wouldn’t it be cool if you could make your character move faster, have more health, or deal more damage? Games are one thing but as a Computer Scientist for the Government, having the source code makes it possible to verify the system performance and understand the weakness or strength of an algorithm.
Fortunately, open source software exists and is thriving today making computer
programming accessible to everyone. For this exercise we are going to use a
simple ‘for loop’ to build a wall by pushing the b key. We created this
YouTube video about this chapter 01 Building Automatically.
To get started with this programming exercise, first copy 00_flat_world_TVR.py code to a new file 01_building_automatically_TVR.py but replace TVR with your initials using the following command:
cp 00_flat_world_TVR.py 01_building_automatically_TVR.py
The first thing we have to do is tell the program that the b key is worth
listening to; so, jump down to line 742 and make the adjustments as shown
below:
    def on_key_press(self, symbol, modifiers):
        """ Called when the player presses a key. See pyglet docs for key
        mappings.

        Parameters
        ----------
        symbol : int
            Number representing the key that was pressed.
        modifiers : int
            Number representing any modifying keys that were pressed.

        """
        if symbol == key.W:
            self.strafe[0] -= 1
        elif symbol == key.S:
            self.strafe[0] += 1
        elif symbol == key.A:
            self.strafe[1] -= 1
        elif symbol == key.D:
            self.strafe[1] += 1
        elif symbol == key.SPACE:
            if self.dy == 0:
                self.dy = JUMP_SPEED
        elif symbol == key.ESCAPE:
            self.set_exclusive_mouse(False)
        elif symbol == key.Y:
            self.position = (0, 0, 0)
            dx, dy, dz = self.get_motion_vector()
            self.dy = 0
        elif symbol == key.TAB:
            self.flying = not self.flying
        elif symbol in self.num_keys:
            index = (symbol - self.num_keys[0]) % len(self.inventory)
            self.block = self.inventory[index]
        elif symbol == key.B:
            self.build_wall()
Take note that the method we are working on is called “on_key_press” which is a name
that makes a lot of sense because this code will be executed when a key is
pressed. Lots of keys exist on the keyboard and for this game; however, we only care
about the keys listed so we use an if-else statement to execute lines of code
when that particular key is pressed. The code is obvious when symbol is equal
to the constant key b then execute the method build_wall(). So next would be a
good time to create the build_wall method.
    def build_wall(self):
        """ Builds a simple wall

        """
        for x in range(-10, 10):
            self.model.add_block((x, -1, -10), STONE)
            self.model.add_block((x, 0, -10), STONE)
            self.model.add_block((x, 1, -10), STONE)
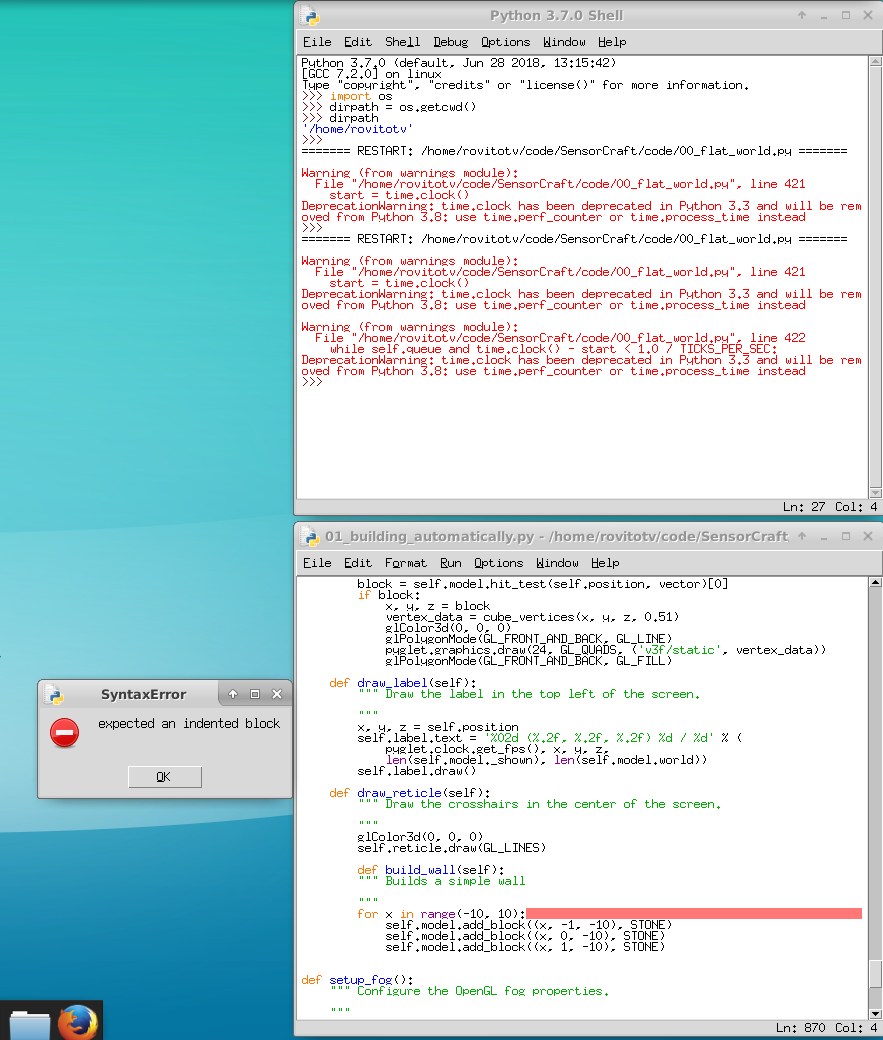
The build_wall method is created at the end of the Window class on line 857, be sure to tab this method over two tabs or Python will be unhappy. Python uses whitespace (in our case the tab character) to delimit program blocks, which is a genius feature of Python because you don’t have to count braces like in many other languages. One of the key advantages of using IDLE is if the tabs are not correct it will highlight the error with a red underline as shown below:
A “for loop” is a critical structure in computer science and is often used by programmers to repeat instructions over and over again and increment (or decrement) a variable. In this case the variable is x and it will run over the range starting at -10 and ending before 10. Notice that for each iteration of the for loop a block is added at a different elevation -1, 0, or 1. We will explain 3-dimensional coordinate systems in the next chapter.
Building a Great Wall Automatically - Part 2
By changing a single variable in the for loop, the wall can be turned into a great wall. We created this YouTube video about this chapter 01 Building Automatically - part 2.. Simply change the build_wall method as follows:
    def build_wall(self):
        """ Builds a simple wall

        """
        for x in range(-100, 100):
            self.model.add_block((x, -1, -10), STONE)
            self.model.add_block((x, 0, -10), STONE)
            self.model.add_block((x, 1, -10), STONE)
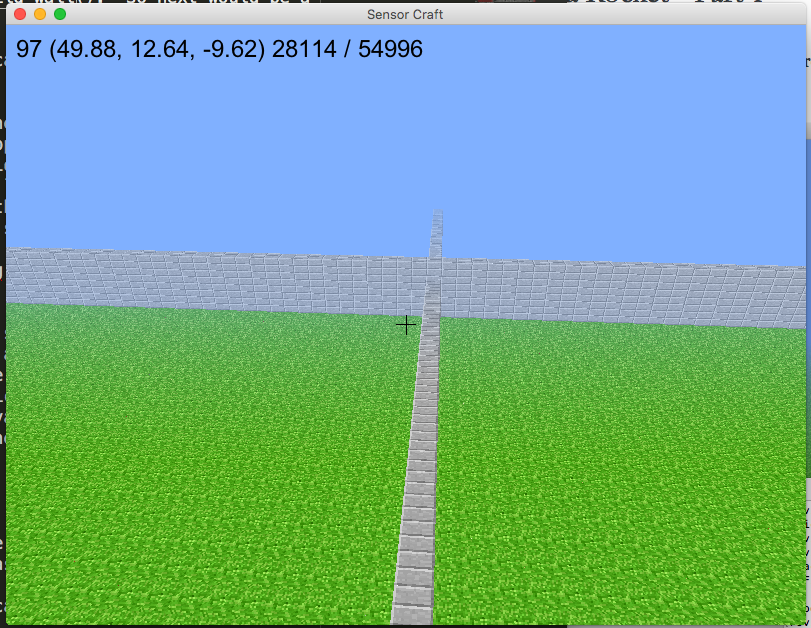
Notice that the x variable in the for loop now goes from -100 to 100, and the wall goes past the boundaries of the world. Below is a picture of what the wall should look like in the great wall form.
Building a Pyramid Automatically - Part 3
Pyramids can be a challenging structure to build in a block based game because of all the repetition. Pyramids are essentially smaller and smaller squares laid on-top of each other. We created this YouTube video about this chapter 01 Building Automatically - part 3..
Before we build a pyramid, let’s make it easier to construct solid shapes by
creating a method that takes two x, y, z points as parameters, then adds blocks
in between those two points. Lets call this new method add_blocks(), and
place it in the model class on line 255.
    def add_blocks(self, position1, position2, texture, immediate=True):
        """ Add a volume of blocks with the given `texture` from position 1 to
        position  to the world.

        Parameters
        ----------
        position1 : tuple of len 3
            The (x, y, z) position of the block to add.
        position2 : tuple of len 3
            The (x, y, z) position of the block to add.
        texture : list of len 3
            The coordinates of the texture squares. Use `tex_coords()` to
            generate.
        immediate : bool
            Whether or not to draw the block immediately.

        """
        # this code below finds the lowest x, y, z
        if position1[0] < position2[0]:
            x_start = position1[0]
            x_end = position2[0] + 1
        else:
            x_start = position2[0]
            x_end = position1[0] + 1
        if position1[1] < position2[1]:
            y_start = position1[1]
            y_end = position2[1] + 1
        else:
            y_start = position2[1]
            y_end = position1[1] + 1
        if position1[2] < position2[2]:
            z_start = position1[2]
            z_end = position2[2] + 1
        else:
            z_start = position2[2]
            z_end = position1[2] + 1

        for x in range(x_start, x_end):
            for y in range(y_start, y_end):
                for z in range(z_start, z_end):
                    self.add_block((x, y, z), texture, immediate)
The add_blocks() method is complicated, so don’t feel bad if you don’t
understand all of it. Python ‘for loops’ uses the range function which doesn’t include
the last number in the range so we have to add a +1 to the end of every range.
To make sure the ranges increment in the proper direction, we check the
arguments to determine the start of each of the ranges for x, y, and z. Finally,
we use three for loops to fill in all the blocks similar to what we have done
in previous chapters. It is reasonable not to care how the add_blocks()
method works and just use the method when you need to use it.
We changed the key from b to p in the on_key_press method to build
the pyramid automatically as listed in the code below:
    def on_key_press(self, symbol, modifiers):
        """ Called when the player presses a key. See pyglet docs for key
        mappings.

        Parameters
        ----------
        symbol : int
            Number representing the key that was pressed.
        modifiers : int
            Number representing any modifying keys that were pressed.

        """
        if symbol == key.W:
            self.strafe[0] -= 1
        elif symbol == key.S:
            self.strafe[0] += 1
        elif symbol == key.A:
            self.strafe[1] -= 1
        elif symbol == key.D:
            self.strafe[1] += 1
        elif symbol == key.SPACE:
            if self.dy == 0:
                self.dy = JUMP_SPEED
        elif symbol == key.ESCAPE:
            self.set_exclusive_mouse(False)
        elif symbol == key.Y:
            self.position = (0, 0, 0)
            dx, dy, dz = self.get_motion_vector()
            self.dy = 0
        elif symbol == key.TAB:
            self.flying = not self.flying
        elif symbol in self.num_keys:
            index = (symbol - self.num_keys[0]) % len(self.inventory)
            self.block = self.inventory[index]
        elif symbol == key.P:
            self.build_pyramid()
Next, we removed the method build_wall() and then created a new method called
build_pyramid() on line 899. The build_pyramid() methods is shown below:
    def build_pyramid(self):
        """ Builds a pyramid

        """
        posx = 0
        posy = 0
        posz = -10
        width = 8
        # May sure width is odd number so pyramid ends
        # with a single block
        if width % 2 == 0:
            width = width + 1
        height = (width + 1) / 2
        halfsize = int(math.floor(width/2))
        print("Create solid base")
        self.model.add_blocks((posx-halfsize-2, posy-2, posz-halfsize-2), (posx+halfsize+2, posy-2, posz+halfsize+2), GRASS)
        self.model.add_blocks((posx-halfsize-2, posy-1,posz-halfsize-2), (posx+halfsize+2, posy-1, posz+halfsize+2), SAND)

        # Create solid Pyramid
        print("Create Pyramid")
        for y in range(int(posy), int(posy+height)):
            self.model.add_blocks((posx-halfsize, y, posz-halfsize), (posx+halfsize, y, posz+halfsize), SAND)
            halfsize = halfsize - 1
Basically, the build_pyramid() method lays a square that has a width of -1 for
every layer it creates. The add_blocks() method is employed to make the
build_pyramid() method simpler. Now, when the user presses the p key, the
following result should be shown:
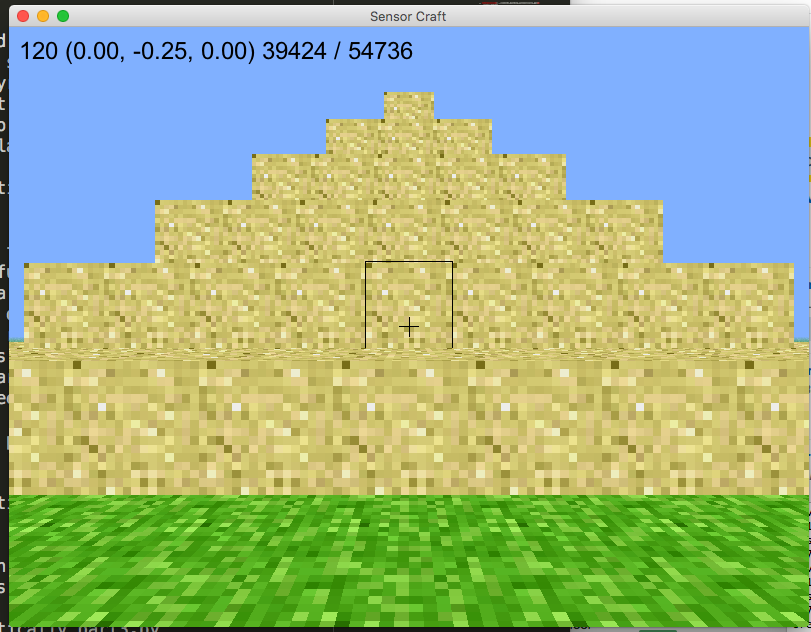
Note, the pyramid will not be placed where the reticle on your screen is
pointing. It will be constructed at the x, y, and z coordinates placed
under the build_pyramid function as defined at the top of the function by
the variables posx, posy, and posz.